

My tutorial is going to show you how to connect to Wi-Fi network from the command line on Proxmox 7 hypervisor using wpa_supplicant, which is an implementation of the supplicant component for the WPA protocol. A wpa_supplicant in wireless LAN is client software installed on hypervisor (Debian 11 Bullseye server) that needs to be authenticated in order to join a wireless network.
Please note that you will need to install the wpa_supplicant software before connecting to Wi-Fi, so you need to connect to wired Ethernet first, which is done during Proxmox 7 install. Nobody knows why Proxmox/Debian team doesn’t ship wpa_supplicant on a clean install.
First of all install wireless-tools:
apt install wireless-tools
Run iwconfig command to find the name of your wireless interface:
iwconfig
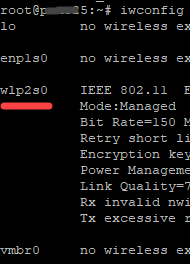 In my example WiFi interface name – wlp2s0
Run the following command to bring up the wireless interface:
ip link set dev wlp2s0 up
Now it’ time to install wpa_supplicant on Debian 11 (Proxmox 7 host):
apt install wpasupplicant
After install run:
wpa_passphrase your-ESSID your-wifi-passphrase | sudo tee -a /etc/wpa_supplicant/wpa_supplicant.conf
This command will create a file named wpa_supplicant.conf using the wpa_passphrase utility. File wpa_supplicant.conf is configuration file describing all networks that you want the server to connect to. Run the following command to create this file. Replace ESSID (network name) and Wi-Fi passphrase with your own.
Test your wireless connectivity:
wpa_supplicant -c /etc/wpa_supplicant/wpa_supplicant.conf -i wlp2s0
iwconfig
To obtain a private IP address from DHCP server, use the following command:
dhclient wlp2s0
Now your WiFi interface has a private IP address, you can check it by following command:
ip addr show wlp2s0
Next you need to edit /etc/wpa_supplicant/wpa_supplicant.conf file”
nano /etc/wpa_supplicant/wpa_supplicant.conf
it should looks like:
ctrl_interface=/run/wpa_supplicant
update_config=1
network={
        ssid="yuorSSID2"
        #psk="yourPASS"
        psk=yourCODE
        scan_ssid=1
}
scan_ssid=1 is important if your AP doesn’t broadcast (hidden) SSID.
If you want to connect to wireless network at boot time, we need to copy the wpa_supplicant.service file.
cp /lib/systemd/system/wpa_supplicant.service /etc/systemd/system/wpa_supplicant.service
Enable wpa_supplicant service to start at boot time:
systemctl enable wpa_supplicant.service
You also need to start dhclient at boot time to obtain a private IP address from your DHCP server. This can be achieved by creating a systemd service unit for dhclient:
nano /etc/systemd/system/dhclient.service
Just copy-paste this text:
[Unit]
Description= DHCP Client
Before=network.target
After=wpa_supplicant.service

[Service]
Type=forking
ExecStart=/sbin/dhclient wlp2s0 -v
ExecStop=/sbin/dhclient wlp2s0 -r
Restart=always

[Install]
WantedBy=multi-user.target
Don’t forget to save it by Ctrl-X -> Y -> Enter.
Restart wpa_supplicant service:
systemctl restart wpa_supplicant.service
Restart Debian networking:
systemctl restart networking
I hope this tutorial helped you connect Proxmox 7 (Debian 11) to Wi-Fi network.
Don’t forget, if you want to connect Proxmox web interface (GUI) – you MUST access GUI with https, type httpS:// before server IP (http don’t work) and the port 8006!