

Recently, Migrating Zabbix Server to another server has become very relevant due to various changes in operating systems. I will tell you how to transfer Zabbix Server from one server to another as simply and quickly as possible. I myself have already done this procedure several times, since, firstly, support for Centos 8 has ended and I am slowly moving to Debian. Secondly, in Centos 7 support for Zabbix Server has been discontinued starting from version 5.4. That is, you will not upgrade to 5.4 without moving to another system.
Introduction
As I said, Zabbix no longer supports Centos 7 as a system for the monitoring server. Although support for the 7th version of the system itself will be until 2023. In theory, it is still relevant. But this is in theory, in practice there are problems. The Zabbix team has several reasons:
- The old version of php is 5.4, but you need at least 7.2 for the new web interface.
- TLS database connections are not supported on Centos 7.
- Older OpenSSL packages do not support TLS 1.3.
All these problems can be solved one way or another, but the guys from Zabbix decided that it was not worth it. Too much hassle with this already obsolete system. And I understand them perfectly, because I myself am tired of such problems with old packages.
As a result, to further upgrade Zabbix Server, you need to migrate from Centos 7 to some other system. I chose Debian 11 as such a system. So in practice I will tell and show how to transfer Zabbix Server from Centos 7 to Debian 11. The instruction will be equally relevant for any system, since the principle is the same.
Preparing to migrate Zabbix Server
The first thing you need to do to migrate Zabbix Server is to install exactly the same version on the new server. If you transfer Zabbix Server 5.0, then install 5.0 on the new server as well. I have detailed instructions for installing Zabbix Server.
You need to not only install and prepare the server itself, but also transfer all configuration files and scripts from the old server to the new one. You can simply copy and overwrite the default configs. And also create a MySQL or PostgreSQL database, depending on what you are using, with the same name, user and password as on the old server. This is not required, but it will be more convenient. You don’t have to change the server config.
When finished, you can start Zabbix Server on the new server and go to the web interface. If you are met by the installer, then everything was done correctly. You can perform a clean installation and make sure that everything is ready, the web interface is working. At the same time, I advise you to carefully look at and transfer everything that can be useful from the old server – external scripts, cron tasks, sudoers settings, and much more that could be used during operation.
Migration of Zabbix Server
Now you can proceed directly to the migration of the monitoring server. To do this, stop the old server:
systemctl stop zabbix-server zabbix-agent
Doing a database dump. It stores all monitoring information that needs to be transferred.
/usr/bin/mysqldump --opt -v --databases zabbix -uzabbix -p'password' | /usr/bin/gzip -c > ~/zabbix.sql.gz
zabbix – zabbix database name
-uzabbix – switch -u followed by database username
-p’password’ – switch -p and then the password of the database user, if there are special characters in the password, escape them with single quotes
This dump needs to be transferred to the new server. You can use any method you are used to. In simple cases, I prefer scp:
scp ~/zabbix.sql.gz [email protected]:/tmp
10.10.10.9 – ip address of the new server to which we transfer Zabbix. We no longer start the zabbix-server service on the old server.
We go to the new server, unpack the database archive:
gunzip ~/zabbix.sql.gz
Open the MySQL console and restore the dump to the Zabbix database:
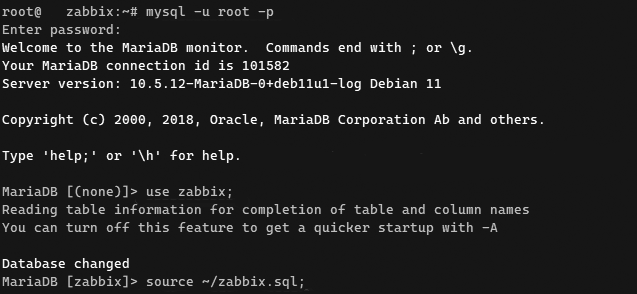
mysql -u root -p
> use zabbix;
> source ~/zabbix.sql;
We are waiting for the completion of the operation. This can take a very long time if the base is large.
After the dump is loaded, you can go to the web interface of the new server and make sure that everything is restored and the server looks the same as in the old place. If everything is OK, then turn off the old monitoring server and do not turn it on again with this IP. And on the new one, set the IP address of the old one and also reboot to be sure.
After the new server with the migrated Zabbix boots up, all agents will start sending information to it, since nothing has changed for them. In fact, this transfer is completed.
Conclusion
In this case, I performed a fairly simple transfer of Zabbix Server with a conditionally small database that can be removed and loaded with a regular dump, organizing a simple service for a while. If your base is too large, or a long downtime is unacceptable, then you need to use other approaches. Here I can’t give any advice, because you yourself need to figure out what exactly suits you specifically. Perhaps it makes sense to raise a replica of the base and transfer it in this way, and then make the slave the master.
In general, the transfer of Zabbix Server is just a transfer of its database, since it stores all its state in it, with the exception of the configuration of the service itself and possibly some additional scripts.