
Good reasons to choose CentOS for your Hyper-V based Linux server:
- CentOS is based on RHEL. This is not something that someone is assembling in their garage (not that I personally think that’s a problem, but your executives may disagree)
- CentOS has wide community support and familiarity. You can easily find help on the Internet. You will also not struggle to find support organizations that you can pay for help.
- CentOS has a great deal in common with other Linux distributions. Because Linux is open source software, it’s theoretically possible for a distribution to completely change everything about it. In practice, no one does. That means that the bulk of knowledge you have about any other Linux distribution is applicable to CentOS.
Where to get CentOS 7 server operating system
You can download CentOS for free from www.centos.org. You are presented with a few packaging options. I recommend to chose “DVD ISO” and that’s the base used in this article. If you have a Torrent application installed, choose that option to download.
How to Build a Hyper-V Virtual Machine for CentOS server
There’s no GUI and CentOS is small, so don’t create a large virtual machine. These are my guidelines:
- 2 virtual CPUs, no reservation. All modern operating systems work noticeably better when they can schedule two threads as opposed to one. You can turn it up later if you’re deployment needs more.
- Dynamic Memory ON; 512MB startup memory, 256MB minimum memory, 1GB maximum memory. You can always adjust Dynamic Memory’s maximum upward, even when the VM is active. Start low.
- 40GB disk is probably much more than you’ll ever need. I use a dynamically expanding VHDX because there’s no reason not to. The published best practice is to create this with a forced 1 megabyte block size, which must be done in PowerShell. I didn’t do this on my first several Linux VMs and noticed that they do use several gigabytes more space, although still well under 10 apiece. I leave the choice to you.
- If using Hyper-V 2016 (Hyper-V 2019 and later), you can leave Secure Boot enabled as long as you select the “Microsoft Certification Authority”.
- If your Hyper-V host is a member of a failover cluster and the Linux VM will be HA, use a static MAC address. Linux doesn’t respond well when its MAC addresses change.
#function New-LinuxVM {
  #requires -Modules Hyper-V
  [CmdletBinding(SupportsShouldProcess=$true)]
  param
  (
    [Parameter(Mandatory=$true, Position=1)][String]$VMName,
    [Parameter()][String]$VHDXName = '',
    [Parameter()][String]$VMStoragePath = '',
    [Parameter()][String]$VHDStoragePath = '',
    [Parameter()][String]$InstallISOPath = '',
    [Parameter()][Switch]$Cluster,
    [Parameter()][String]$VMSwitchName = '',
    [Parameter()][Uint32]$StartupMemory = 512MB,
    [Parameter()][Uint32]$MinimumMemory = 256MB,
    [Parameter()][Uint32]$MaximumMemory = 1GB,
    [Parameter()][Uint64]$VHDXSizeBytes = 40GB
  )

  if([String]::IsNullOrEmpty($VHDXName))
  {
    $VHDXName = '{0}.vhdx' -f $VMName
  }
  if($VHDXName -notmatch '\.vhdx$')
  {
    $VHDXName += '.vhdx'
  }
  if([String]::IsNullOrEmpty($VMStoragePath))
  {
    $VMStoragePath = (Get-VMHost).VirtualMachinePath
  }
  if(-not (Test-Path -Path $VMStoragePath))
  {
    Write-Error -Message ('VM path {0} does not exist.' -f $VMStoragePath)
    return
  }
  if([String]::IsNullOrEmpty($VHDStoragePath))
  {
    $VHDStoragePath = (Get-VMHost).VirtualHardDiskPath
  }
  if(-not (Test-Path -Path $VHDStoragePath))
  {
    Write-Error -Message ('Storage path {0} does not exist.' -f $VHDStoragePath)
    return
  }
  $VHDStoragePath = Join-Path -Path $VHDStoragePath -ChildPath $VHDXName
  if([String]::IsNullOrEmpty($InstallISOPath) -or -not (Test-Path -Path $InstallISOPath -PathType Leaf))
  {
    Write-Error -Message ('ISO {0} does not exist' -f $InstallISOPath)
    return
  }
  if([String]::IsNullOrEmpty($VMSwitchName))
  {
    $VMSwitchName = (Get-VMSwitch | ? SwitchType -eq 'External')[0].Name
  }
  if([String]::IsNullOrEmpty($VMSwitchName))
  {
    Write-Error -Message ('No virtual switch specified')
    return
  }

  $VM = New-VM -Name $VMName -MemoryStartupBytes $StartupMemory -SwitchName $VMSwitchName -Path $VMStoragePath -Generation 2 -NoVHD
  Set-VMMemory -VM $VM -DynamicMemoryEnabled $true -MinimumBytes $MinimumMemory -MaximumBytes $MaximumMemory
  Set-VMProcessor -VM $VM -Count 2
  Start-VM -VM $VM
  Stop-VM -VM $VM -Force
  New-VHD -Path $VHDStoragePath -SizeBytes $VHDXSizeBytes -Dynamic -BlockSizeBytes 1MB
  $VMVHD = Add-VMHardDiskDrive -VM $VM -ControllerType SCSI -ControllerNumber 0 -ControllerLocation 0 -Path $VHDStoragePath -Passthru
  $VMDVDDrive = Add-VMDvdDrive -VM $VM -ControllerNumber 0 -ControllerLocation 1 -Passthru
  $VMNetAdapter = Get-VMNetworkAdapter -VM $VM
  Set-VMNetworkAdapter -VMNetworkAdapter $VMNetAdapter -StaticMacAddress ($VMNetAdapter.MacAddress)
  Set-VMFirmware -VM $VM -BootOrder $VMDVDDrive, $VMVHD, $VMNetAdapter -EnableSecureBoot On -SecureBootTemplate 'MicrosoftUEFICertificateAuthority'
  Set-VMDvdDrive -VMDvdDrive $VMDVDDrive -Path $InstallISOPath
  if($Cluster)
  {
    Add-ClusterVirtualMachineRole -VMName $VMName
  }
#}
If you’re going to use this a lot, I would consider entering some defaults on the parameters so that you don’t need to enter them all each time. For instance, you’re probably not going to move your install ISO often.
You could also use your first installation as the basis for a clone. Use a generic name for the VM and VHDX if that’s your plan.
CentOS Installation walkthrough
When you first boot, it will default to Test this media & install CentOS 7. You can skip the media check and just Install CentOS Linux 7.

Choose your language:

After selecting the language, you’ll be brought to the Installation Summary screen. Wait a moment for it to detect your environment. As an example, the screenshot shows Not Ready for the Security Policy. It will change to No profile selected once it has completed its checks.
You can work through the items in any order. Anything without the warning triangle can be skipped entirely.
I start with the NETWORK & HOST NAME screen as that can have bearing on other items. When you first access the screen, it will show Disconnected because it hasn’t been configured yet. That’s different behavior from Windows, which will only show disconnected if the virtual network adapter is not connected to a virtual switch.

If you’ll be using DHCP, click the Off slider button at the top right for it to attempt to get an IP. For static or advanced configuration, click the Configure.
Don’t forget to change the host name at the lower left of the networking screen before leaving.
After you’ve set up networking, set the DATE & TIME. If it can detect a network connection, you’ll be allowed to set the Network Time slider to On. Configure as desired.

You must click into the Installation Destination screen or the installer will not allow you to proceed.

By default, it will select the entirety of the first hard drive for installation. It will automatically figure out the best way to divide storage. You can override it if you like. If you’re OK with defaults, just click Done.

Explore the other screens as you desire. I don’t set anything else on my systems. At this point, you can click Begin Installation.

While the system installs, you’ll be allowed to set the root password and create the initial user.
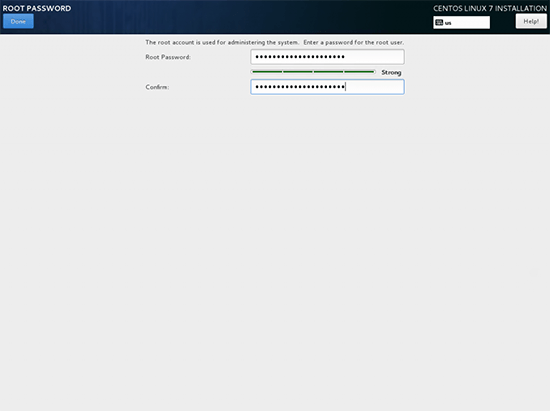
As you enter the password for root, the system will evaluate its strength. If it decides that the password you chose isn’t strong enough, you’ll be forced to click Done twice to confirm.
The root account is the rough equivalent of the Administrator account on Windows, so do take appropriate steps to secure it with a strong password and exercise care in the keeping of that password.
The user creation screen is straightforward. It has the same password-strength behavior as the root screen.
Now just wait for the installation to complete. Click Reboot. You’ll be left at the login screen of a completely installed CentOS virtual machine.
Assuming that you created a user for yourself and made it administrator, it’s best to log in with that account. It’s poor practice to use the root account, and even worse to leave the root account logged in. Otherwise, you can log in as root.
CentOS Post-Install Wrap-Up for Hyper-V
First of all get the best tool in your Linux-controlling arsenal – PuTTY.

It’s a remote console and it can keep sessions. It allows for simple copy/paste actions. Highlight text, and it’s copied. Right-click the window, and it’s pasted at the cursor location. Otherwise, you’ll need to type things manually or use the Paste Clipboard feature in the Hyper-V VMCONNECT window. Whatever you choose, just make sure that you follow these steps sooner rather than later.
All commands are case-sensitive, you should add in front of each command “sudo ” if not logged in as root and you will be prompted for your password in this case. If you logged in as root just copy/paste.
-
Install package patches and upgrades
yum upgrade
-
Install Nano editor
yum install -y nano
-
Enable Dynamic Memory In-Guest
You need to enable the Hot Add feature if you want to use Dynamic Memory with CentOS.
Start by creating a “rules” file. The location is important (/etc/udev/rules.d) but the name isn’t. I’ll just use the same one from Microsoft’s instructions:
nano /etc/udev/rules.d/100-balloon.rules
You’ll now be looking at an empty file in the nano editor. Type or paste the following:
SUBSYSTEM=="memory", ACTION=="add", ATTR{state}="online"
Now press [CTRL]+[X] to exit, then press [Y] to confirm and [Enter] to confirm the filename. Remember it.
At next reboot, Dynamic Memory will be functional.
-
Change the Disk I/O Scheduler
By default, Linux wants to help optimize disk I/O. Hyper-V also wants to optimize disk I/O. Two optimizers are usually worse than none. Let’s disable CentOS’s.
You must be root for this (if logged as user):
su root
You’ll be prompted for the root password.
echo noop > /sys/block/sda/queue/scheduler
exit
The above will change the scheduler to “noop”, which means that CentOS will not attempt to optimize I/O for the primary hard disk. “exit” tells CentOS to exit from the root login back to your login.
-
Install Extra Hyper-V Tools
yum install -y hyperv-daemons
-
Reboot your system
shutdown -r now
Done! 🙂
Further server configuration is described in the article:
Advanced CentOS 7 Server Configuration – Tips and Tricks
You did not like the article and/or want to teach me something new? Please, I love to study! Comments at your disposal. Tell me how to do it better! 🙂
Please feel free to comment here! 🙂